Have you ever thought about selling more tickets on your event’s website? Then you need to see what Google Tag Manager (GTM) can do for you.
It’s one of the many free marketing tools offered by Google.
With GTM, you can add banners to your site, track visit data, and improve your ads…
In today’s article, I’ll show you how to do all of this in practice! Here’s what you’ll learn:
- What is Google Tag Manager?
- How to track specific data on your event website with Google Tag Manager
- 5 steps to create advanced ad campaigns with GTM
- How to add banners to your event website with Google Tag Manager
What Is Google Tag Manager and What Does It Do?
Basically, as the name suggests, Google Tag Manager is a tag manager for your website.
Tags are small pieces of code that collect and send information about how users interact with a website.
For example, how many people clicked a link, which pages they visited, which products they bought, and much more.
This information can be used by several other marketing applications.
Google Ads uses it to power ads, Google Analytics uses it to track behavioral data on the site, and so on.
In the past, for these applications to collect the information they needed to work, you had to manually install each one’s tag in the site’s code.
But then GTM came along! With it, adding, using, and removing tags is much simpler and more accessible for anyone, even if you don’t know how to code.
All you need to do is insert a small piece of code into your site, and from then on you can make any changes directly in GTM. Here’s how it works in practice!
How to Track Specific Data on Your Event Website with Google Tag Manager
Tracking your event website’s visitor data is crucial for understanding your audience’s behavior and optimizing your marketing strategies.
Google actually has a free tool built exactly for this: Google Analytics.
But you can take the data it collects even further!
For example, you can track specific behaviors, such as visits to your checkout page or clicks on registration buttons.
To do that, just follow these steps:
1. Integrate Google Tag Manager with Google Analytics
The first step is to link GTM to Google Analytics. In this article, Google itself explains in detail how to do it.
After that, the data tracked by the tags you create in GTM will be sent directly to your Analytics dashboard, making it easier to monitor metrics in real time.
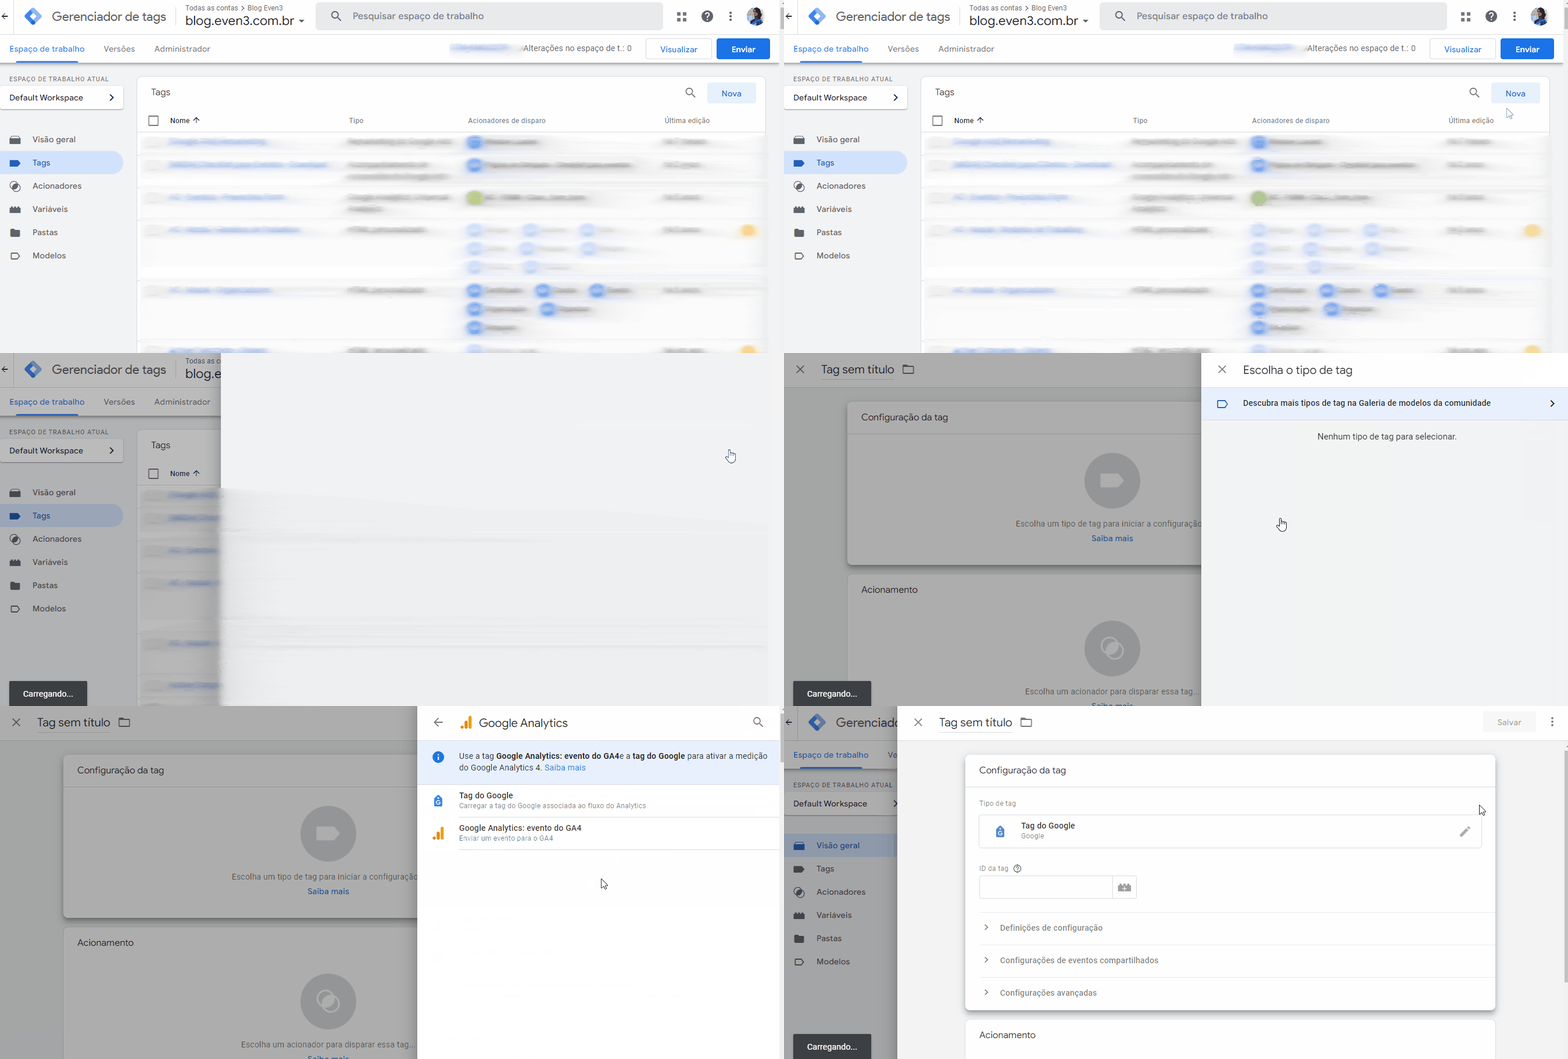
2. Create Custom Tags
With GTM, you can set up tags to monitor specific actions.
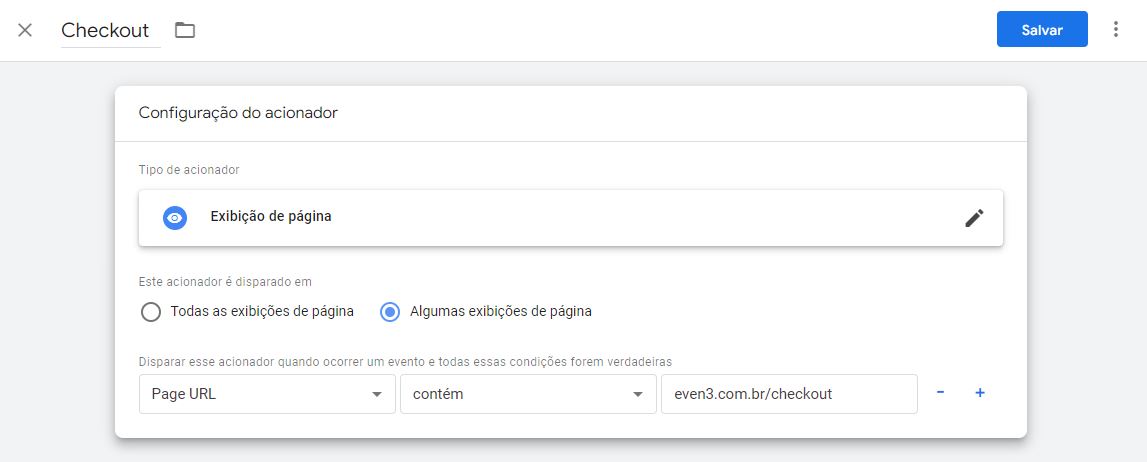
For example, you could create a tag that tracks how many people reached the checkout page but didn’t complete their purchase. This can help you optimize your sales funnel and understand where users are dropping off.
To do this, just define the tag’s Trigger — that is, the action that will activate the tag on your site.
In this case, it will be triggered whenever someone visits the checkout page:
3. Manage Multiple Events
Create multiple tags to monitor how users behave on your site.
Besides checkout, GTM lets you add other behavioral events, such as button clicks, file downloads, and form submissions — all in real time and simultaneously!
That’s why it’s worth reading this Google tutorial, which teaches you how to create tags to monitor different actions.
This way, you’ll have a comprehensive view of your visitors’ behavior.
5 Steps to Create Advanced Ad Campaigns with GTM
If you want to increase your event’s reach and sell more tickets, it might be time to invest in ads with Google Ads.
Paired with Google Tag Manager, Ads can work even more precisely and relevantly.
That’s because GTM’s integration lets you build advanced, highly specific campaigns. All you need to do is:
- Set up your Google Tag Manager account: Make sure your GTM account is connected to your website and to Google Ads through the Google Tag.
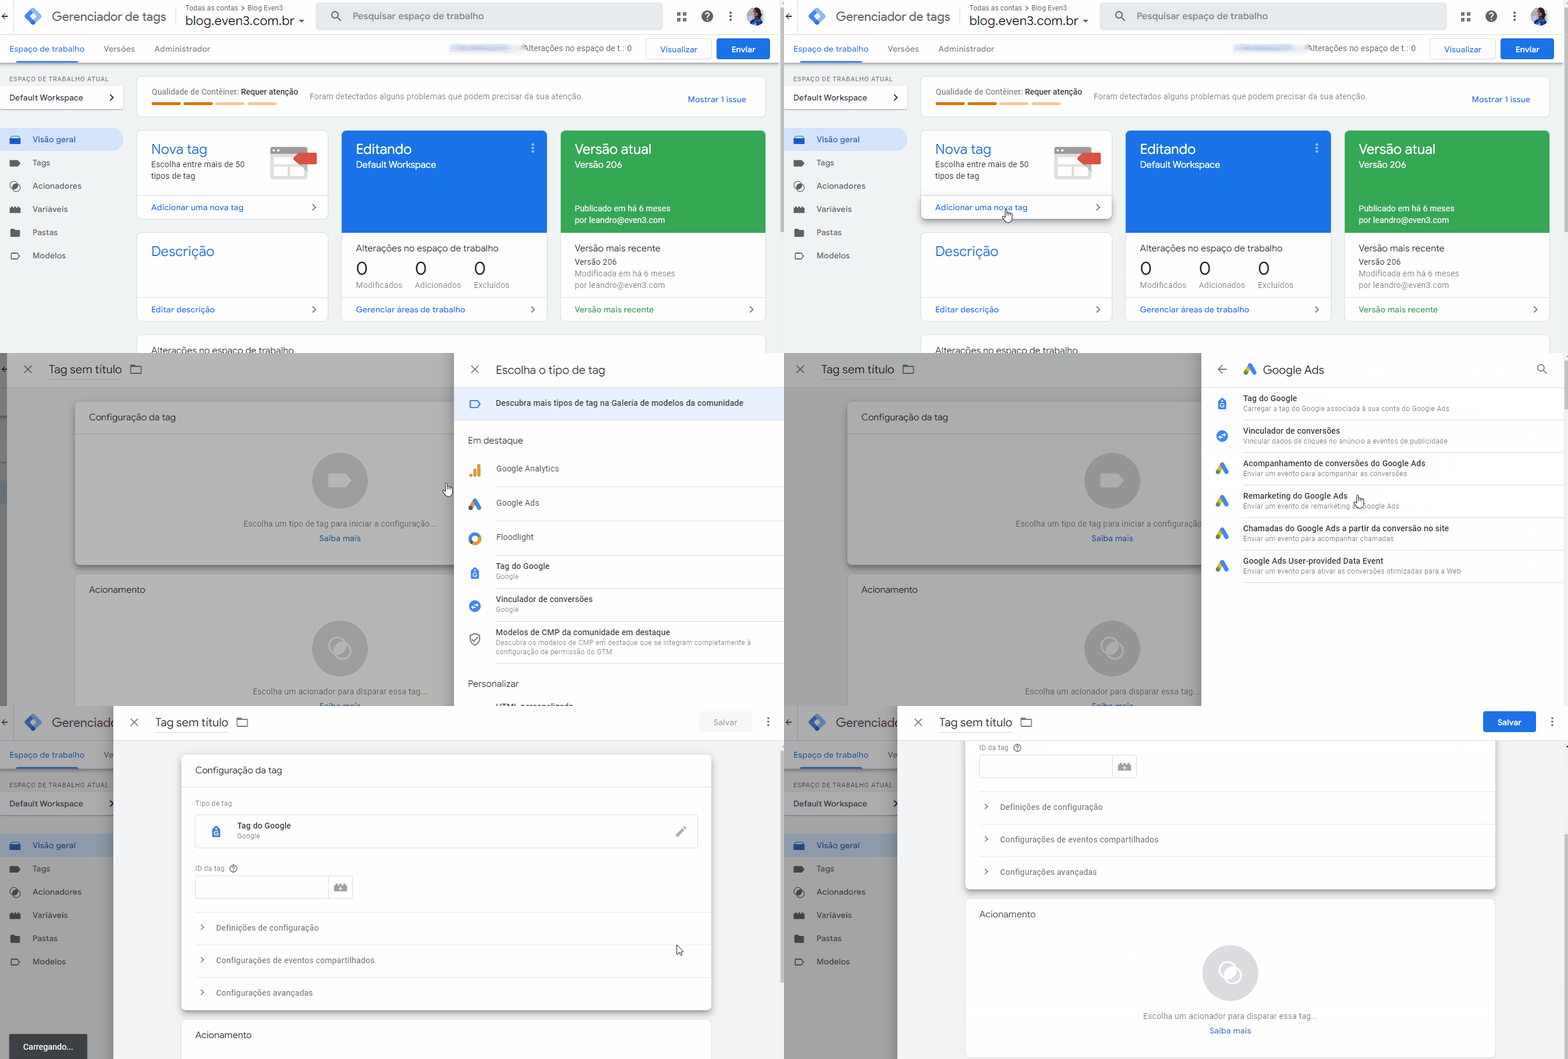
- Create a conversion tag: In GTM, you can set up tags to track specific conversions. For example, you could create a tag that shows ads to users who visited a registration page but didn’t complete the purchase.
- Enable remarketing: Set up remarketing tags to show personalized ads to visitors who came to your site but didn’t convert. This is especially effective for events, since you can re-engage people who showed interest but didn’t complete the action.
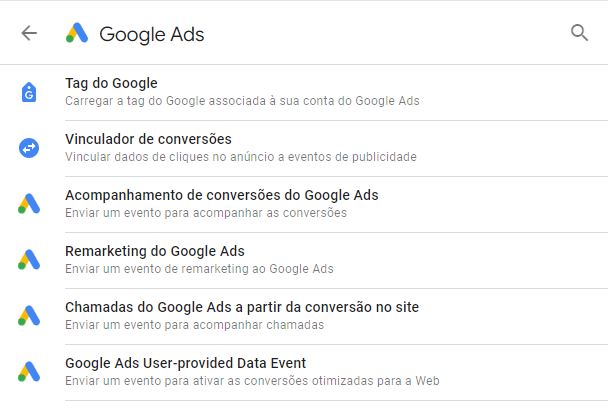
- Track campaign performance: With your tags set up, GTM will provide detailed data you can analyze in Google Ads. This helps you adjust your strategy based on how users behave on your site.
- Optimize targeting: Using the information GTM collects, you can improve the audience for your Google Ads campaigns, making sure your ads reach increasingly relevant people.
How to Add Banners to Your Event Website with Google Tag Manager
Remember when I said Google Tag Manager works together with lots of different tools?
One option is to pair it with apps that create banners, buttons, or forms, such as BDOW.
That way, you can add them without needing to touch your site’s code directly.
These banners can encourage visitors to complete their registration, offer discount coupons, direct people to event content, a WhatsApp group, and more…
Just follow these steps:
Connect the Tool You Want with GTM
You’ve probably noticed by now that the first step is always to connect the tool with GTM, right?
In this case, we chose BDOW, a tool that offers several free banner, button, and form options.
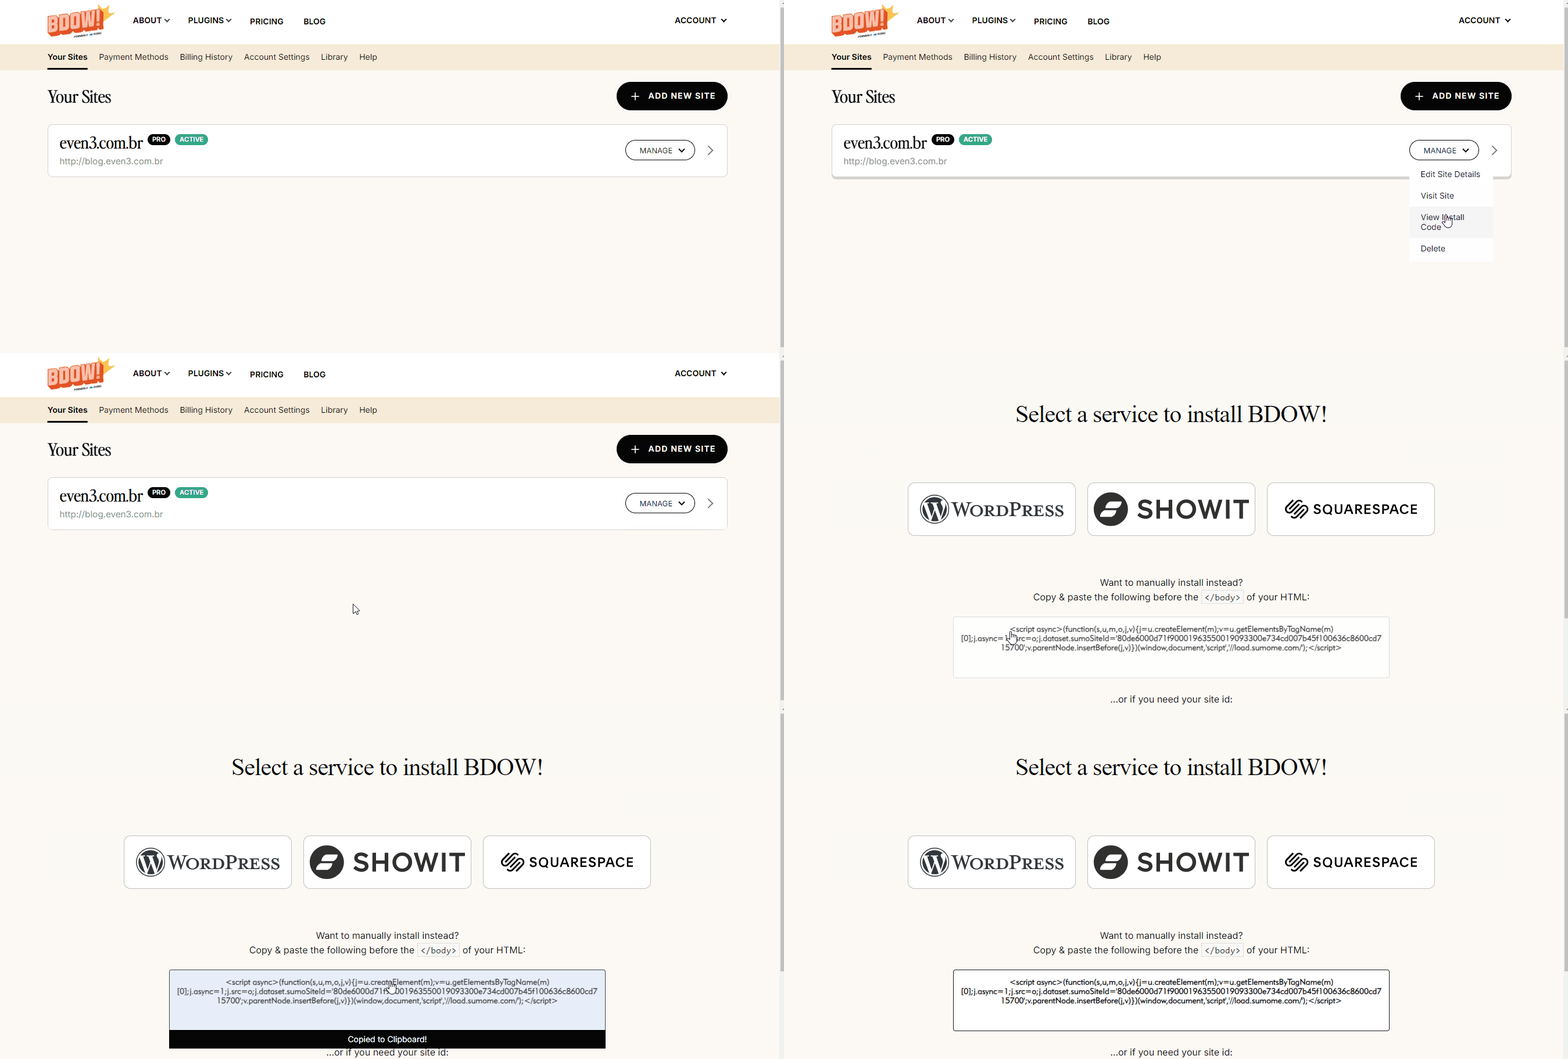
You’ll create them directly in BDOW and choose where to display them on your site. But before doing that on the BDOW platform, you need to connect it to GTM.
To do that, set up your BDOW account, go to “Install Code,” and copy it.
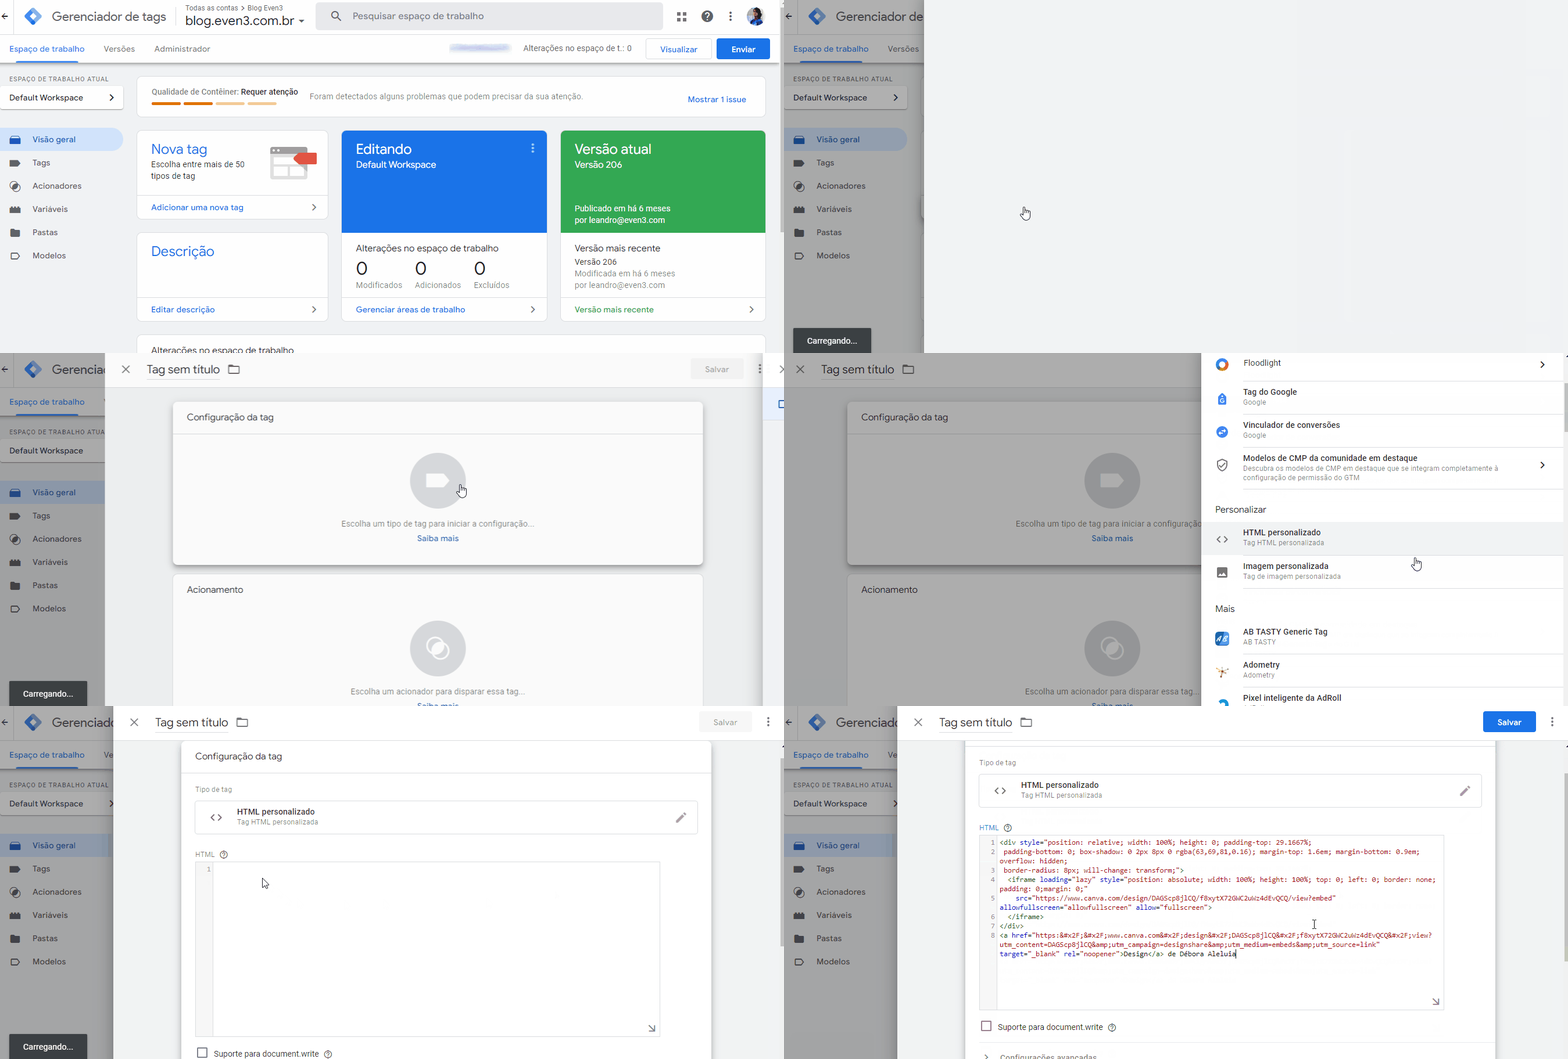
Create a New Tag in GTM
In the Google Tag Manager dashboard, create a new Custom HTML tag. Paste the BDOW code into that tag.
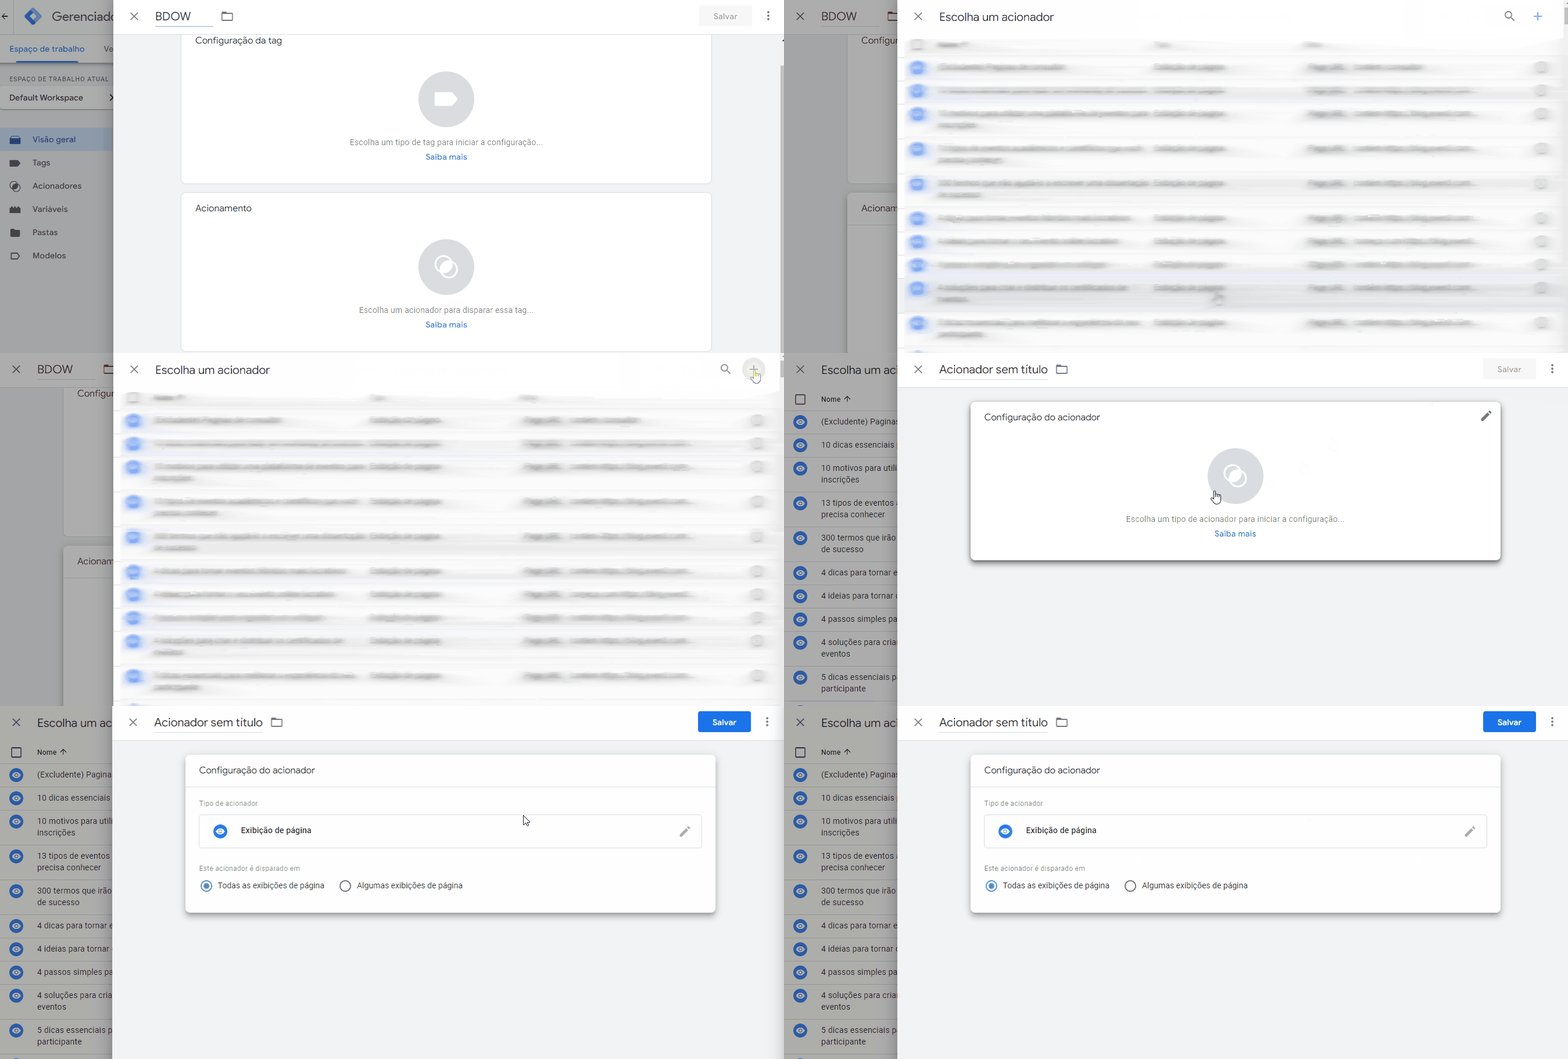
Set the Display Conditions
In GTM, you can specify which pages or sections of your site the banner will appear on. This is the tag’s Trigger.
To activate BDOW across your entire site, set the trigger to display on all pages.
Publish and Test
Once you’ve set up and activated the tag, just create your banners, buttons, and forms in BDOW and choose within the tool itself where to display them.
Since it’s active across your whole site, there shouldn’t be any issues showing buttons on specific pages and forms elsewhere.
From then on, any change you make in BDOW will show up directly on your site. You won’t even need to touch GTM again!
That said, remember to test your banners and check that everything is displaying correctly on your site, okay?
Ultimately, with Google Tag Manager you’ll be able to quickly manage promotional banners, ads, and event tracking.
This brings more autonomy and flexibility, while also helping you optimize your marketing campaigns and metric tracking.
But none of this works without a well-organized, visually appealing event website, right?
Building event websites isn’t always simple, but today there are tools that let you do all of this without touching a single line of code.
Track Your Event’s Performance with Even3
Google Tag Manager helps you understand and optimize how people interact with your event website. But you also need a solid platform behind that website to turn those insights into results.
With Even3, you get a complete events platform that lets you:
- Build a fully customizable event website for free;
- Sell tickets and manage registrations;
- Track attendee data and behavior;
- Run and measure your marketing campaigns;
- Issue certificates and much more.