Five minutes before the event starts, the auditorium doors open and the rush begins. People saving chairs with their bags, groups split up, a speaker with no seat in the front row and a VIP guest sitting at the back. Anyone who has organized a packed event knows this scene.
And the solution is simpler than it seems: decide in advance where each person will sit. That is what an event seating chart is for.
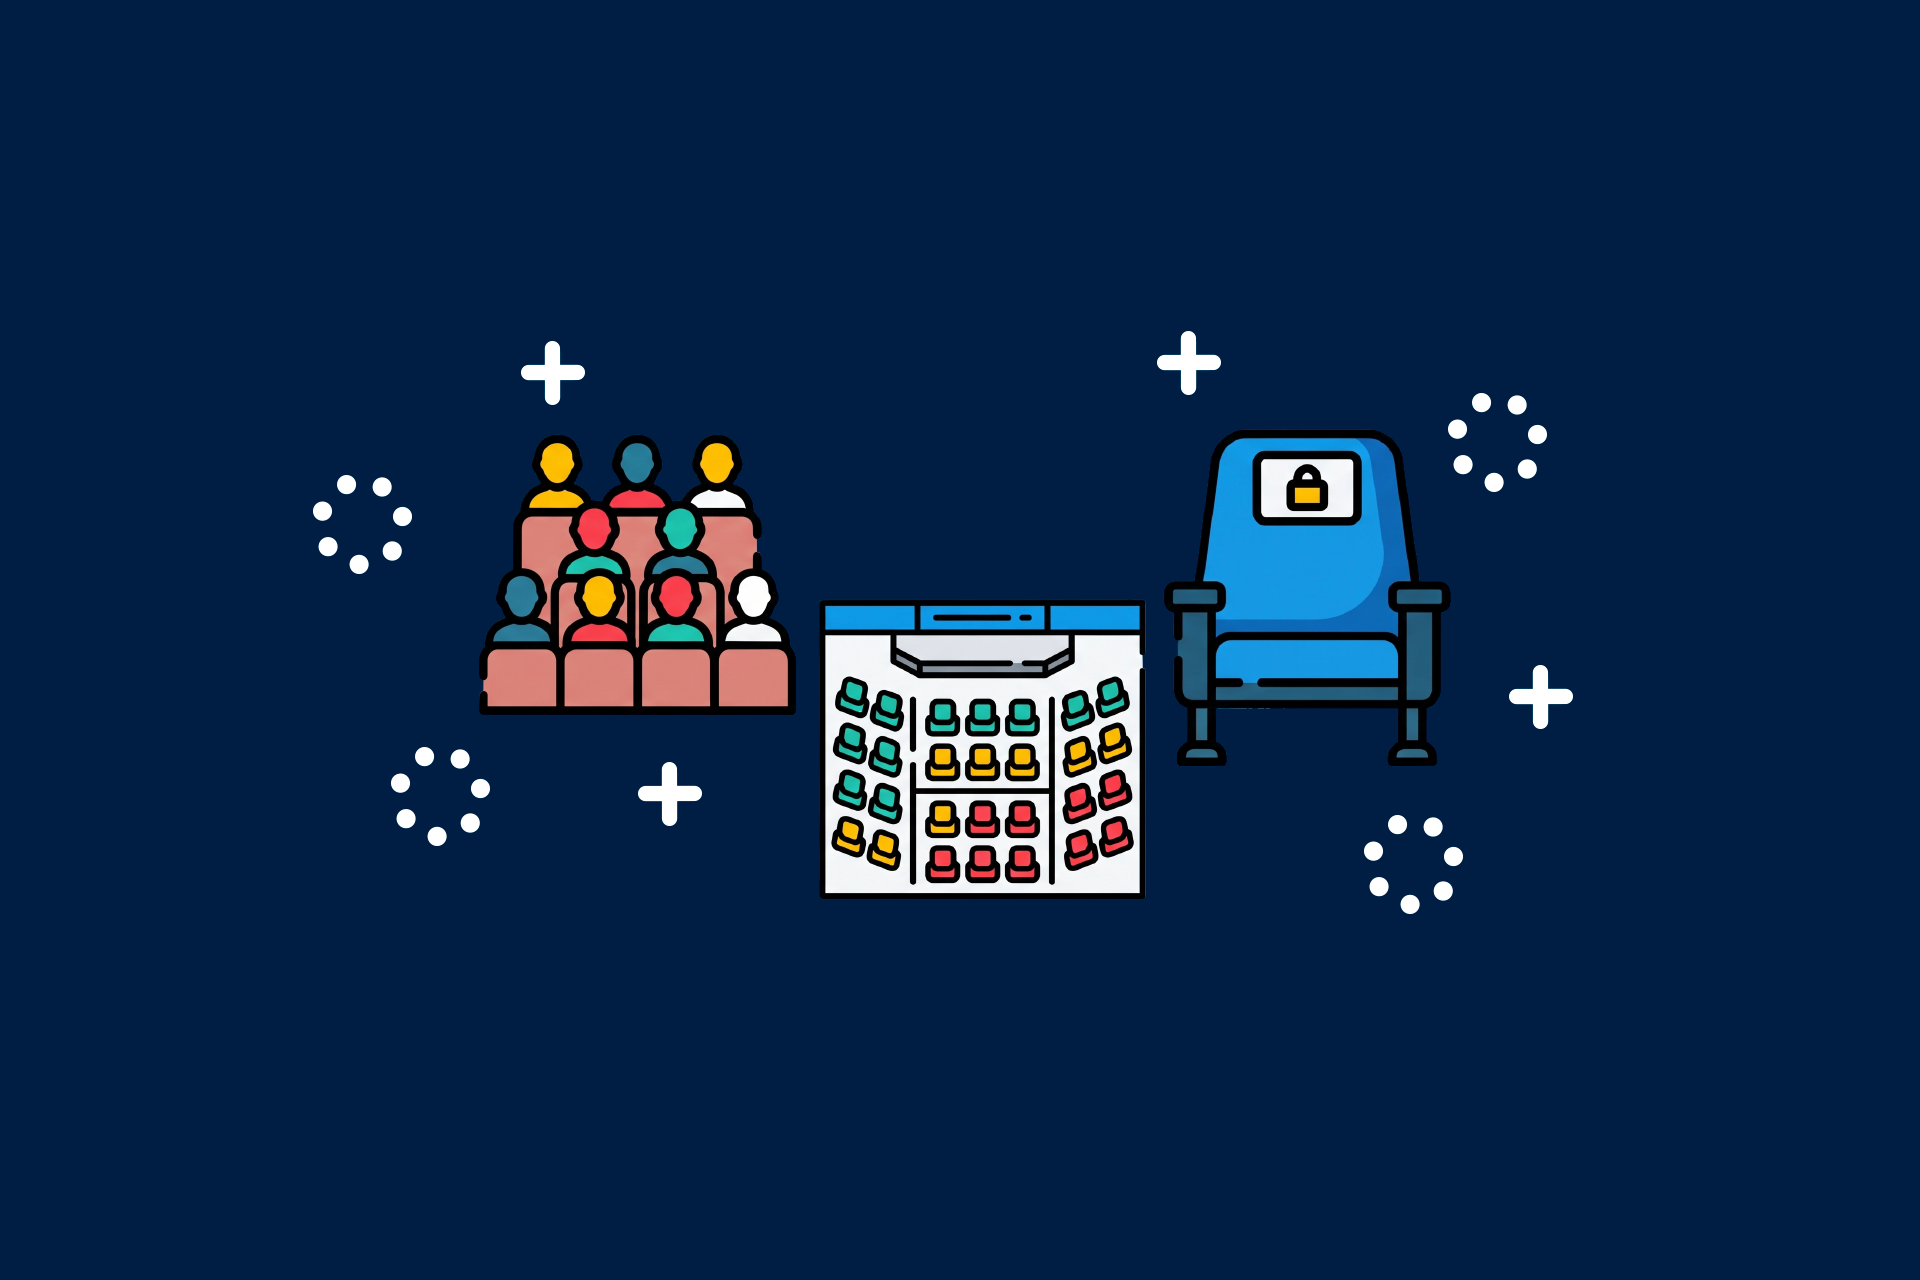
An event seating chart is a visual representation of the venue with every seat numbered and organized by sections, rows or tables. It is used to distribute the audience, control capacity and let each attendee choose or receive a reserved seat before arriving at the event.
In this guide, you will learn the difference between a seating chart, a table plan and a floor plan, when your event needs reserved seating, which layouts to use and, finally, how to build the chart and sell tickets with seat selection online.
What is an event seating chart
A seating chart is a drawing of your venue turned into identifiable seats. Each chair gets a code, usually a letter for the row and a number for the position. For example: section A, row B, seat 3.
In practice, it serves three purposes at the same time:
- It organizes the audience: Everyone knows where to go, so entry flows without fights over seats;
- It controls capacity: You can see how many seats there are, how many are already taken and which ones are free;
- It creates value: Seats with the best view can be reserved for premium tickets, guests or sponsors.
In the past, the seating chart lived on a printed sheet at the check-in desk. Today, however, it can be part of the ticket sale itself. That way, attendees choose their seat at the time of purchase, just like at the movies.
Table plan, seating chart and floor plan: what’s the difference
These three terms often appear together and, because of that, they are frequently confused. But each one answers a different question:
| Criterion | Floor plan | Table plan | Seating chart |
|---|---|---|---|
| What it shows | The physical space: walls, doors, stage, exits and measurements | The position of each table and who sits at each one | Each individual chair, with section, row and number |
| Unit of organization | Square meters | Table (number or name) | Seat (e.g., B3, section A) |
| Question it answers | “What fits in this space?” | “Who sits with whom?” | “Exactly where will each person be?” |
| Typical events | All of them, during planning, but especially trade shows | Gala dinners, award ceremonies, graduations, weddings | Talks, plenary sessions, concerts, shows, ceremonies |
| Who uses it | Organizer, set-up crew and suppliers | Organizer, event protocol team and reception | Organizer, attendees and reception team |
In short, the floor plan comes first. After all, that is where you draw the table plan or the seating chart. And at events with tables and reserved seats at the same time, both charts coexist: table 12, for example, has seats 12A to 12H.
When your event needs a seating chart
Not every event needs reserved seating. A networking cocktail, for example, works better with free circulation. A trade show, on the other hand, works with a different kind of map: the booth map.
The seating chart does make a difference in these situations:
- Tickets with different prices by location: Concerts, shows and talks with a VIP section or premium front rows only work if the seat is guaranteed.
- Packed plenaries and main sessions: At a conference, the opening keynote usually brings everyone together in the same auditorium. With reserved seating, nobody needs to arrive an hour early to get a chair.
- Workshops and activities with limited spots: When each seat corresponds to a spot, the chart prevents the room from receiving more people than it can hold.
- Graduations and ceremonies: Each graduate’s family, officials and the faculty panel need defined seats. Here, the work is usually shared with the event protocol team.
- Gala dinners and award ceremonies: Sponsors, honorees and strategic guests need to be at the right tables.
- Official ceremonies with authorities: At official events, each authority’s position follows an order of precedence (in Brazil, it is defined by Decree No. 70,274/1972). That is why the chart must be ready and double-checked before the day.
- Corporate events with large audiences: Conventions and product launches get a more organized reception and a more predictable experience for those arriving.
In general, a good rule of thumb is this: if an attendee’s position changes their experience, or the price they pay, your event needs a seating chart.
Seating chart layout types
Before numbering any chair, you need to choose how the space will be set up. The layout defines how many people fit, how they interact and, in addition, which type of activity works in that room.
The infographic below summarizes the most common formats:
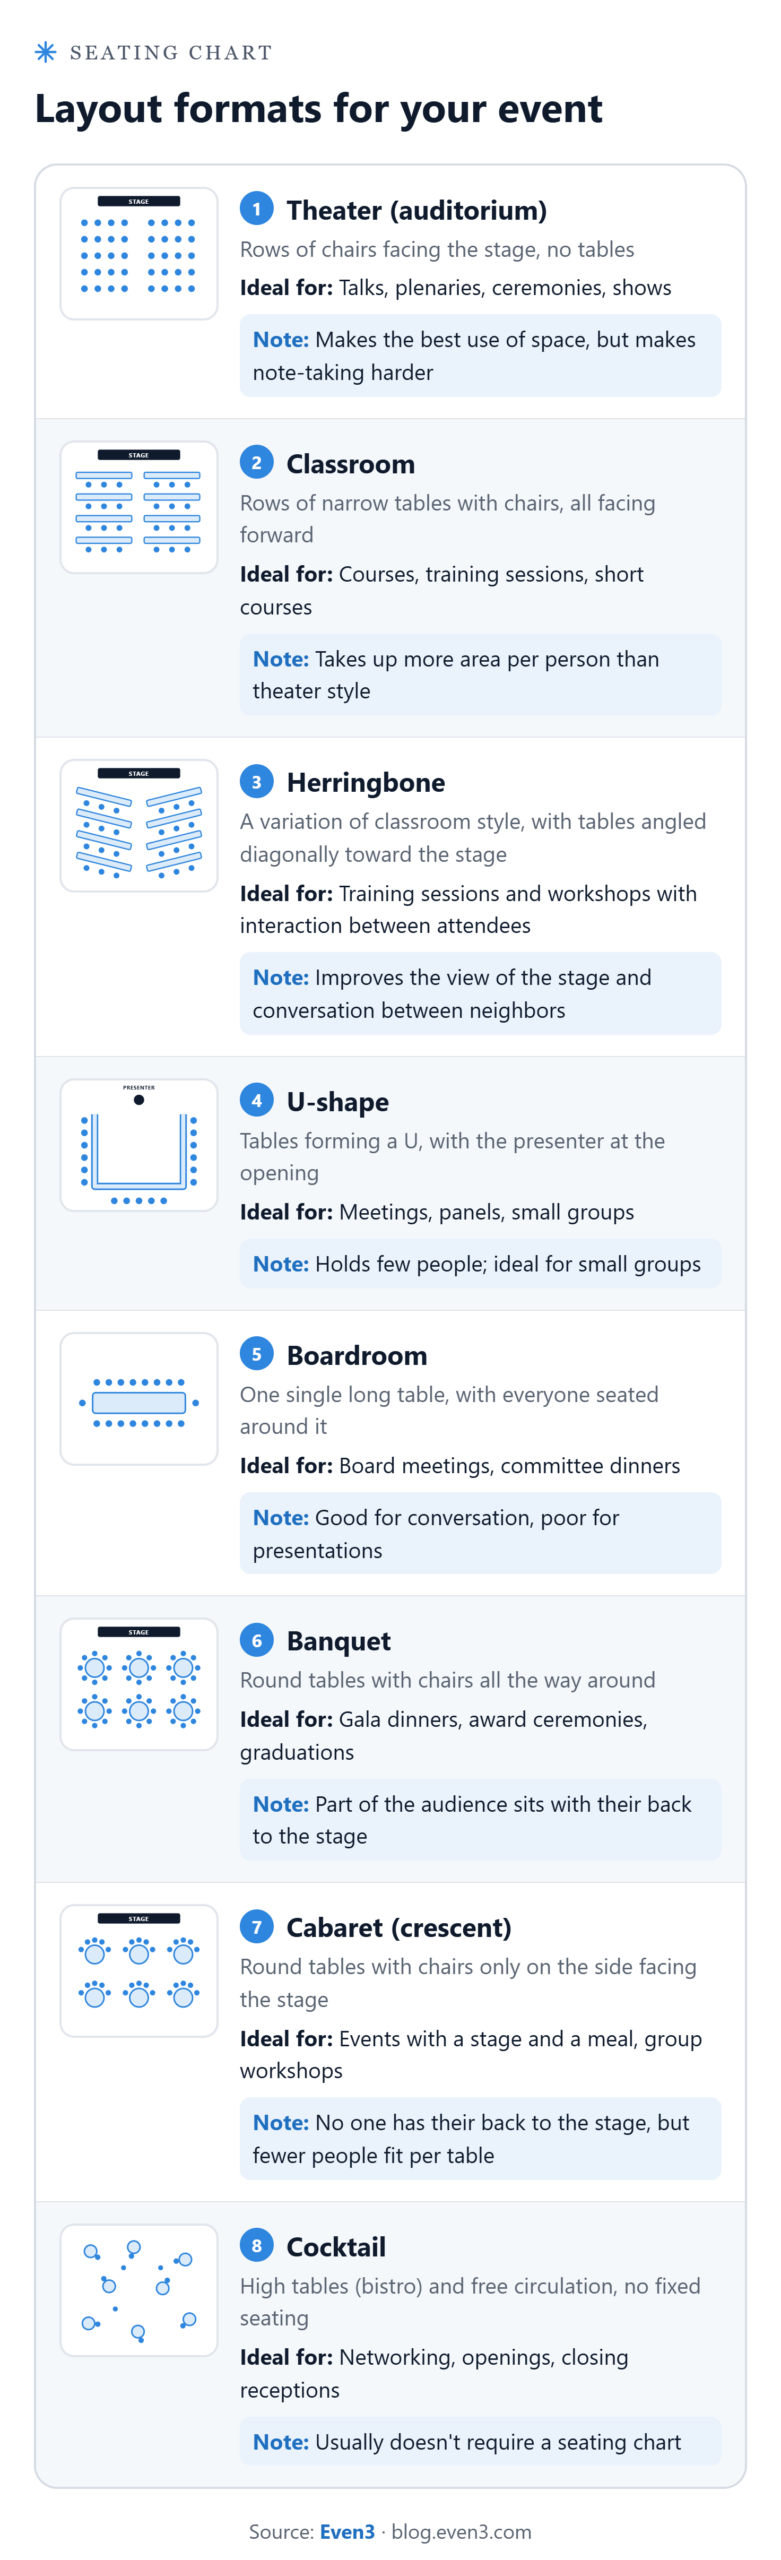
Tip: Before finalizing the layout, confirm the maximum occupancy approved by the fire department for that venue. It matters more than any calculation of chairs per square meter, and your chart should never exceed that number.
What if your event combines formats? That is common. For example, a conference may have the plenary in theater style, short courses in classroom style and the closing dinner in banquet style. In that case, each space gets its own chart.
How to create a seating chart and sell online
Building the chart is only half the job. The other half is making it work together with ticket sales. After all, a beautiful chart is useless if two people buy the same seat. So here is the step by step:
1. Start with the venue’s floor plan
Ask the venue for the updated floor plan, with measurements, doors, emergency exits, stage and pillars. If possible, do a site visit. That way, you find out up close what the plan doesn’t show: the column that blocks the view, the speaker in the aisle or the access ramp.
2. Choose the layout for each room
With the floor plan in hand, define the format of each room, based on the infographic above. Think about the activity, not just the capacity. In other words, a workshop in theater style may fit more people, but the dynamics won’t work.
3. Divide into sections and number the seats
Now, turn the space into identifiable seats:
- Create sections by area or by ticket category (for example, Orchestra A, Orchestra B, VIP).
- Use letters for rows and numbers for chairs, always in the same direction.
- In layouts with tables, number the tables and, if needed, the seats at each one.
- Keep the aisles clear and respect the distance to the emergency exits.
4. Reserve strategic seats
Before opening sales, block the seats that won’t go to the general public: speakers, authorities, sponsors, press and staff.
And don’t forget accessibility. In Brazil, Law No. 10,098/2000 requires venues for shows, conferences and classes to have reserved spaces for wheelchair users and specific seats for people with hearing and visual impairments, and the ABNT NBR 9050 standard details how these spaces should be distributed. So spread these seats throughout the audience, with a good view of the stage, and not just at the back of the room.
5. Define the sales rules
This is where the chart becomes strategy. So decide:
- Which tickets have reserved seating. It can be all of them or only premium categories, such as VIP and guests.
- Whether the seat applies to the whole event or to each activity. The plenary can have one chart, and each workshop another.
- How much each section costs. The front rows can correspond to a more expensive ticket type.
6. Publish the chart in your ticket sales
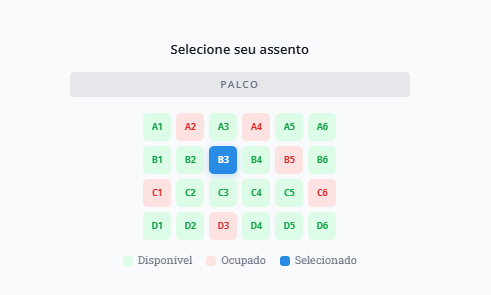
With everything defined, the chart becomes part of the registration flow. The attendee chooses the ticket, sees the chart with available seats and selects theirs. That way, the seat is linked to the registration at the time of purchase.
The critical point at this stage is real-time updating. Without it, you run the risk of selling the same seat twice, especially in the first hours of sales, when demand is highest.
That is why you need to choose a technology that allows this type of ticket sale.
For example, on Even3, this choice happens within the registration itself. You set up the chart with sections, rows and numbered chairs, define whether seat selection applies to the event, to activities or to specific ticket types and, then, open the selection to attendees.
Next, availability updates as each person selects their seat, with no duplicate bookings. In addition, the seat appears on the attendee’s confirmation and ticket.
7. Track occupancy and prepare the reception
During sales, track how many seats have been sold in each section. This number, by the way, helps you decide when to move to the next ticket batch or boost promotion of an emptier section.
As the event approaches, prepare the reception:
- Signpost sections and rows at the venue, with signs visible from the entrance.
- Give the team the list of who is in each seat.
- Agree on what to do with seat swaps and with people who arrive without an assigned seat.
That way, the chart leaves the screen and works on the day, with fewer lines and fewer questions at the entrance.
Tools to create your seating chart
Spreadsheet (Excel or Google Sheets)
A spreadsheet is the fastest option for small events. Each cell becomes a seat, and you fill in the name of the person who will sit there. It works well for a meeting or a dinner with seats assigned by the organizers.
On the other hand, everything is manual and decided by the organizers. In other words, if someone cancels, you need to update the spreadsheet, notify the team and hope everyone is looking at the right version. Also, it doesn’t give attendees the autonomy to decide where they want to sit.
Canva
Canva has ready-made seating chart templates and a drag-and-drop editor. That makes it a good choice for creating the visual version that gets printed at the event entrance or on table signage.
But a Canva chart is an image. So it doesn’t control who occupies each seat or update with sales, sharing the same limitations as spreadsheets.
Miro
Miro is a collaborative whiteboard, with seating chart templates where you drag notes onto tables. It is useful in the planning phase, when the organizer, protocol team and suppliers need to design the layout together.
Like Canva and spreadsheets, however, Miro isn’t connected to registration. So the final list still needs to be checked by hand.
Even3
On Even3, the seating chart lives on the same platform where you sell tickets and manage the event. In practice, this means:
- Seat selection at purchase: The attendee selects the seat during registration, and the seat is automatically linked to the ticket.
- Real-time occupancy: You see how many seats are taken and who is in each one.
- Flexibility: Seat selection can apply to the whole event, to each activity or only to some ticket types.
- Centralized attendee list: Buyer data stays in the same database, ready to export or look up.
- QR code check-in: At the entrance, the team scans the attendee’s code with the app and completes check-in in seconds, even offline.
For a quick comparison:
| Tool | Best for | Sales with seat selection | Automatically updated occupancy |
|---|---|---|---|
| Spreadsheet | Small events with seats assigned by the organizers | No | No |
| Canva | Visual chart to print and use for signage | No | No |
| Miro | Designing the layout as a team | No | No |
| Even3 | Events with ticket sales and reserved seating | Yes | Yes |
In other words, spreadsheets, Canva and Miro help you design the chart. Even3, on the other hand, makes the chart work: it sells, controls and organizes entry. And nothing stops you from using both together, for example, Miro to plan the layout with the team and Even3 to put the seats on sale.
Create your event with reserved seating on Even3
A good event seating chart starts on paper, with a floor plan, layout and numbering. But it is in sales that it shows its value. When attendees choose their seat at purchase, you end the rush at the entrance, control capacity and even create tickets with higher perceived value.
And all of this gets simpler when the chart, tickets, attendees and check-in are in the same place. That is why, on Even3, you set up the event, publish the page, sell tickets with reserved seating and welcome the audience at the entrance without switching tools.
Creating your event takes just a few minutes. Create your event on Even3 for free and get started now: