Have you ever stopped to think about what could happen to your event if it were seen by the people who are genuinely interested in it?
You know that ideal attendee type, with the age, interests, and background that perfectly match what your event is about?
There are definitely thousands of people out there who fit that profile, and the Facebook Pixel can help you reach them.
It’s a tool used to optimize your online ads.
In other words, it makes your campaigns even more targeted, helping you hit your goals faster!
Don’t worry about the odd-sounding name, though. The Facebook Pixel is easy to use. Just follow this walkthrough:
- What is the Facebook Pixel?
- What is the Facebook Pixel used for?
- How do you install the Facebook Pixel?
- Can you delete a Facebook Pixel?
What is the Facebook Pixel?
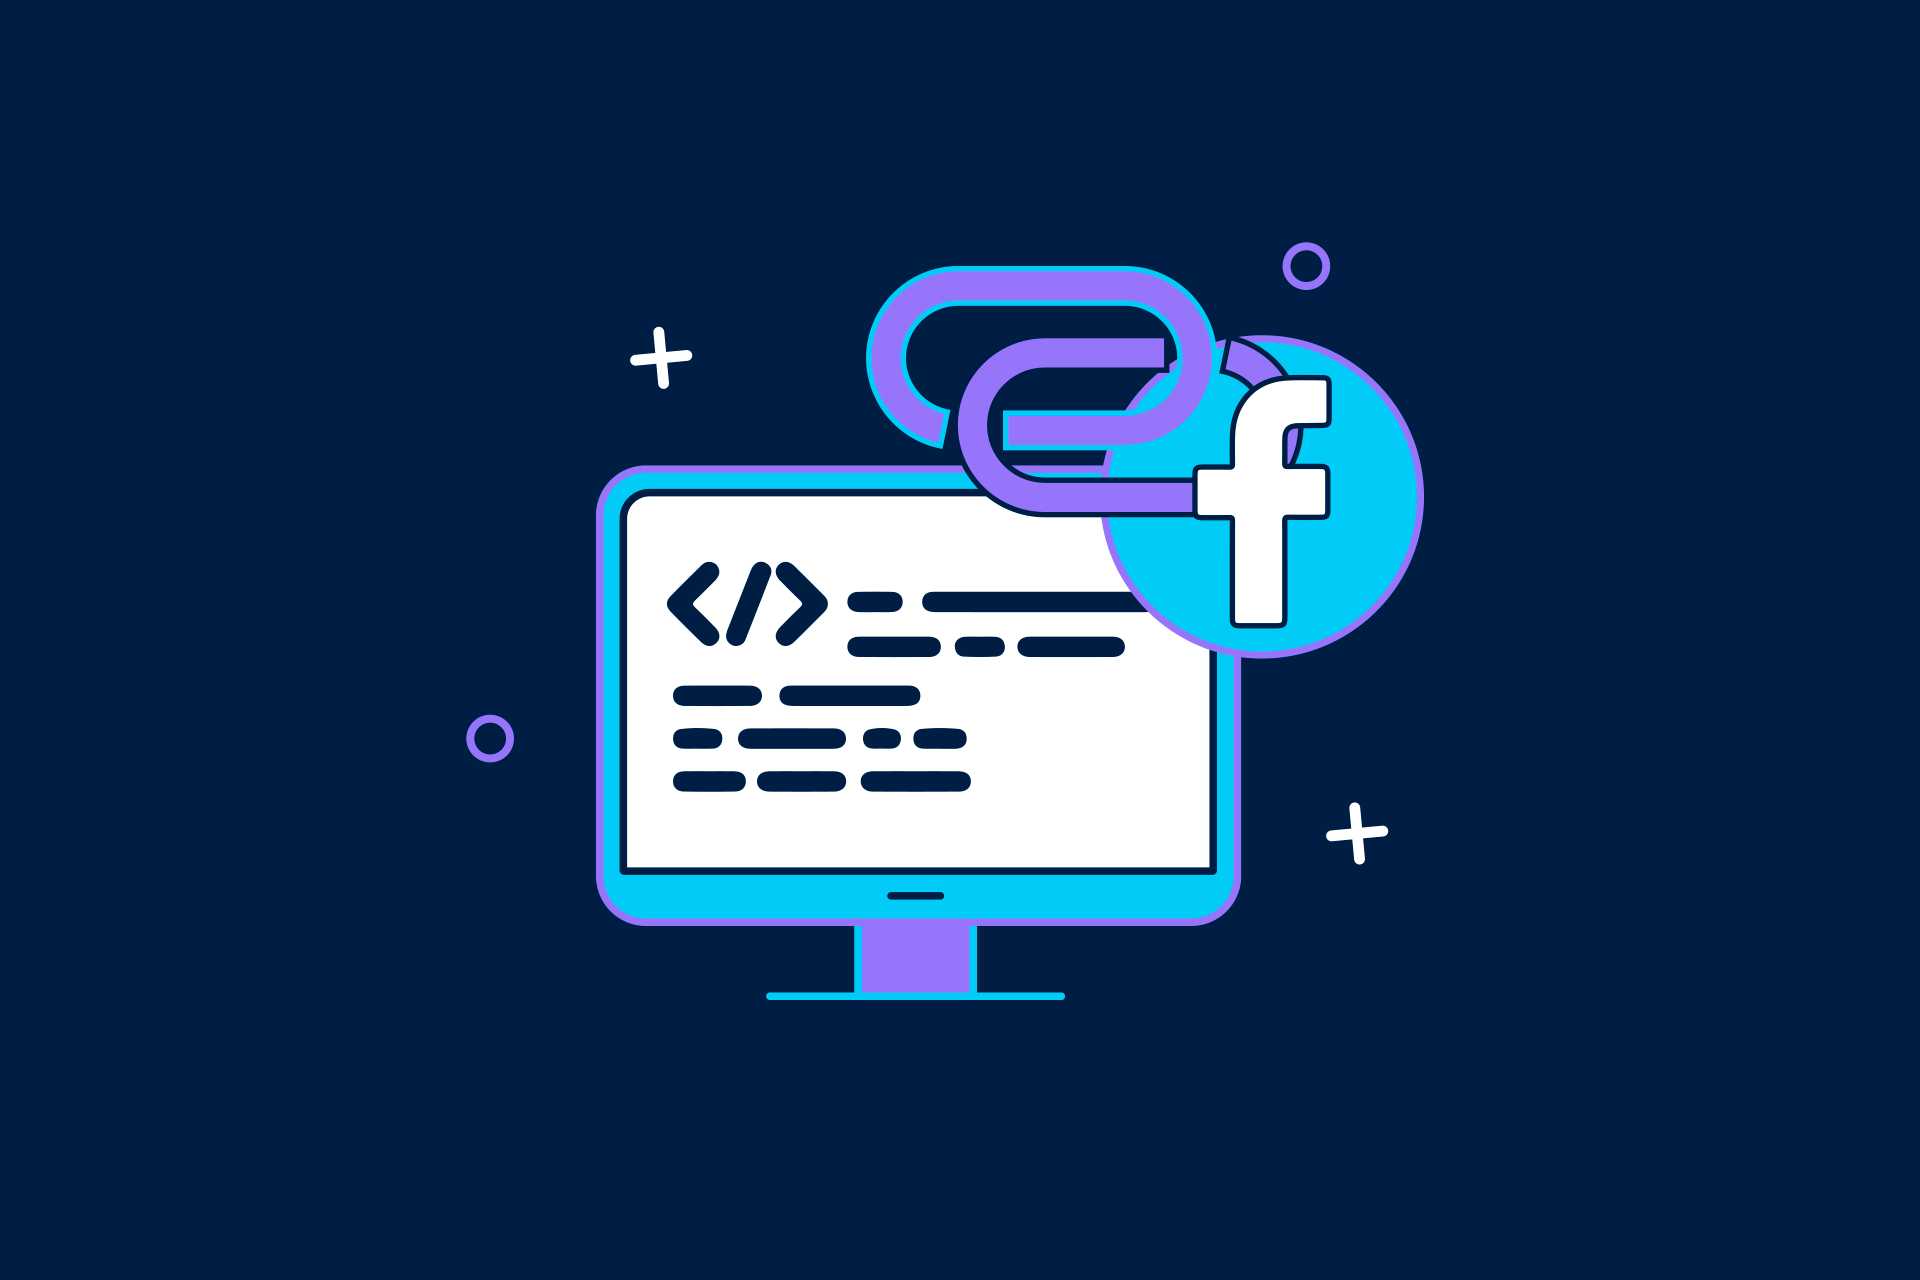
Basically, the Facebook Pixel is a feature that lets you track the actions taken on your event’s website.
For example, whenever someone registers or visits your site, the Pixel logs what happened along with the user’s information.
It then passes all of that data along to Facebook (Meta).
That way, you can see whether your ads are actually generating new registrations, what kind of audience visits your event’s site, and much more.
In other words, this Pixel works almost like a little Facebook spy.
After all, it’s just a snippet of code pasted into your site, and it’s not visible to visitors.
-> Learn more: Instagram Ads: how to create ads on Instagram and sell registrations
What is the Facebook Pixel used for?
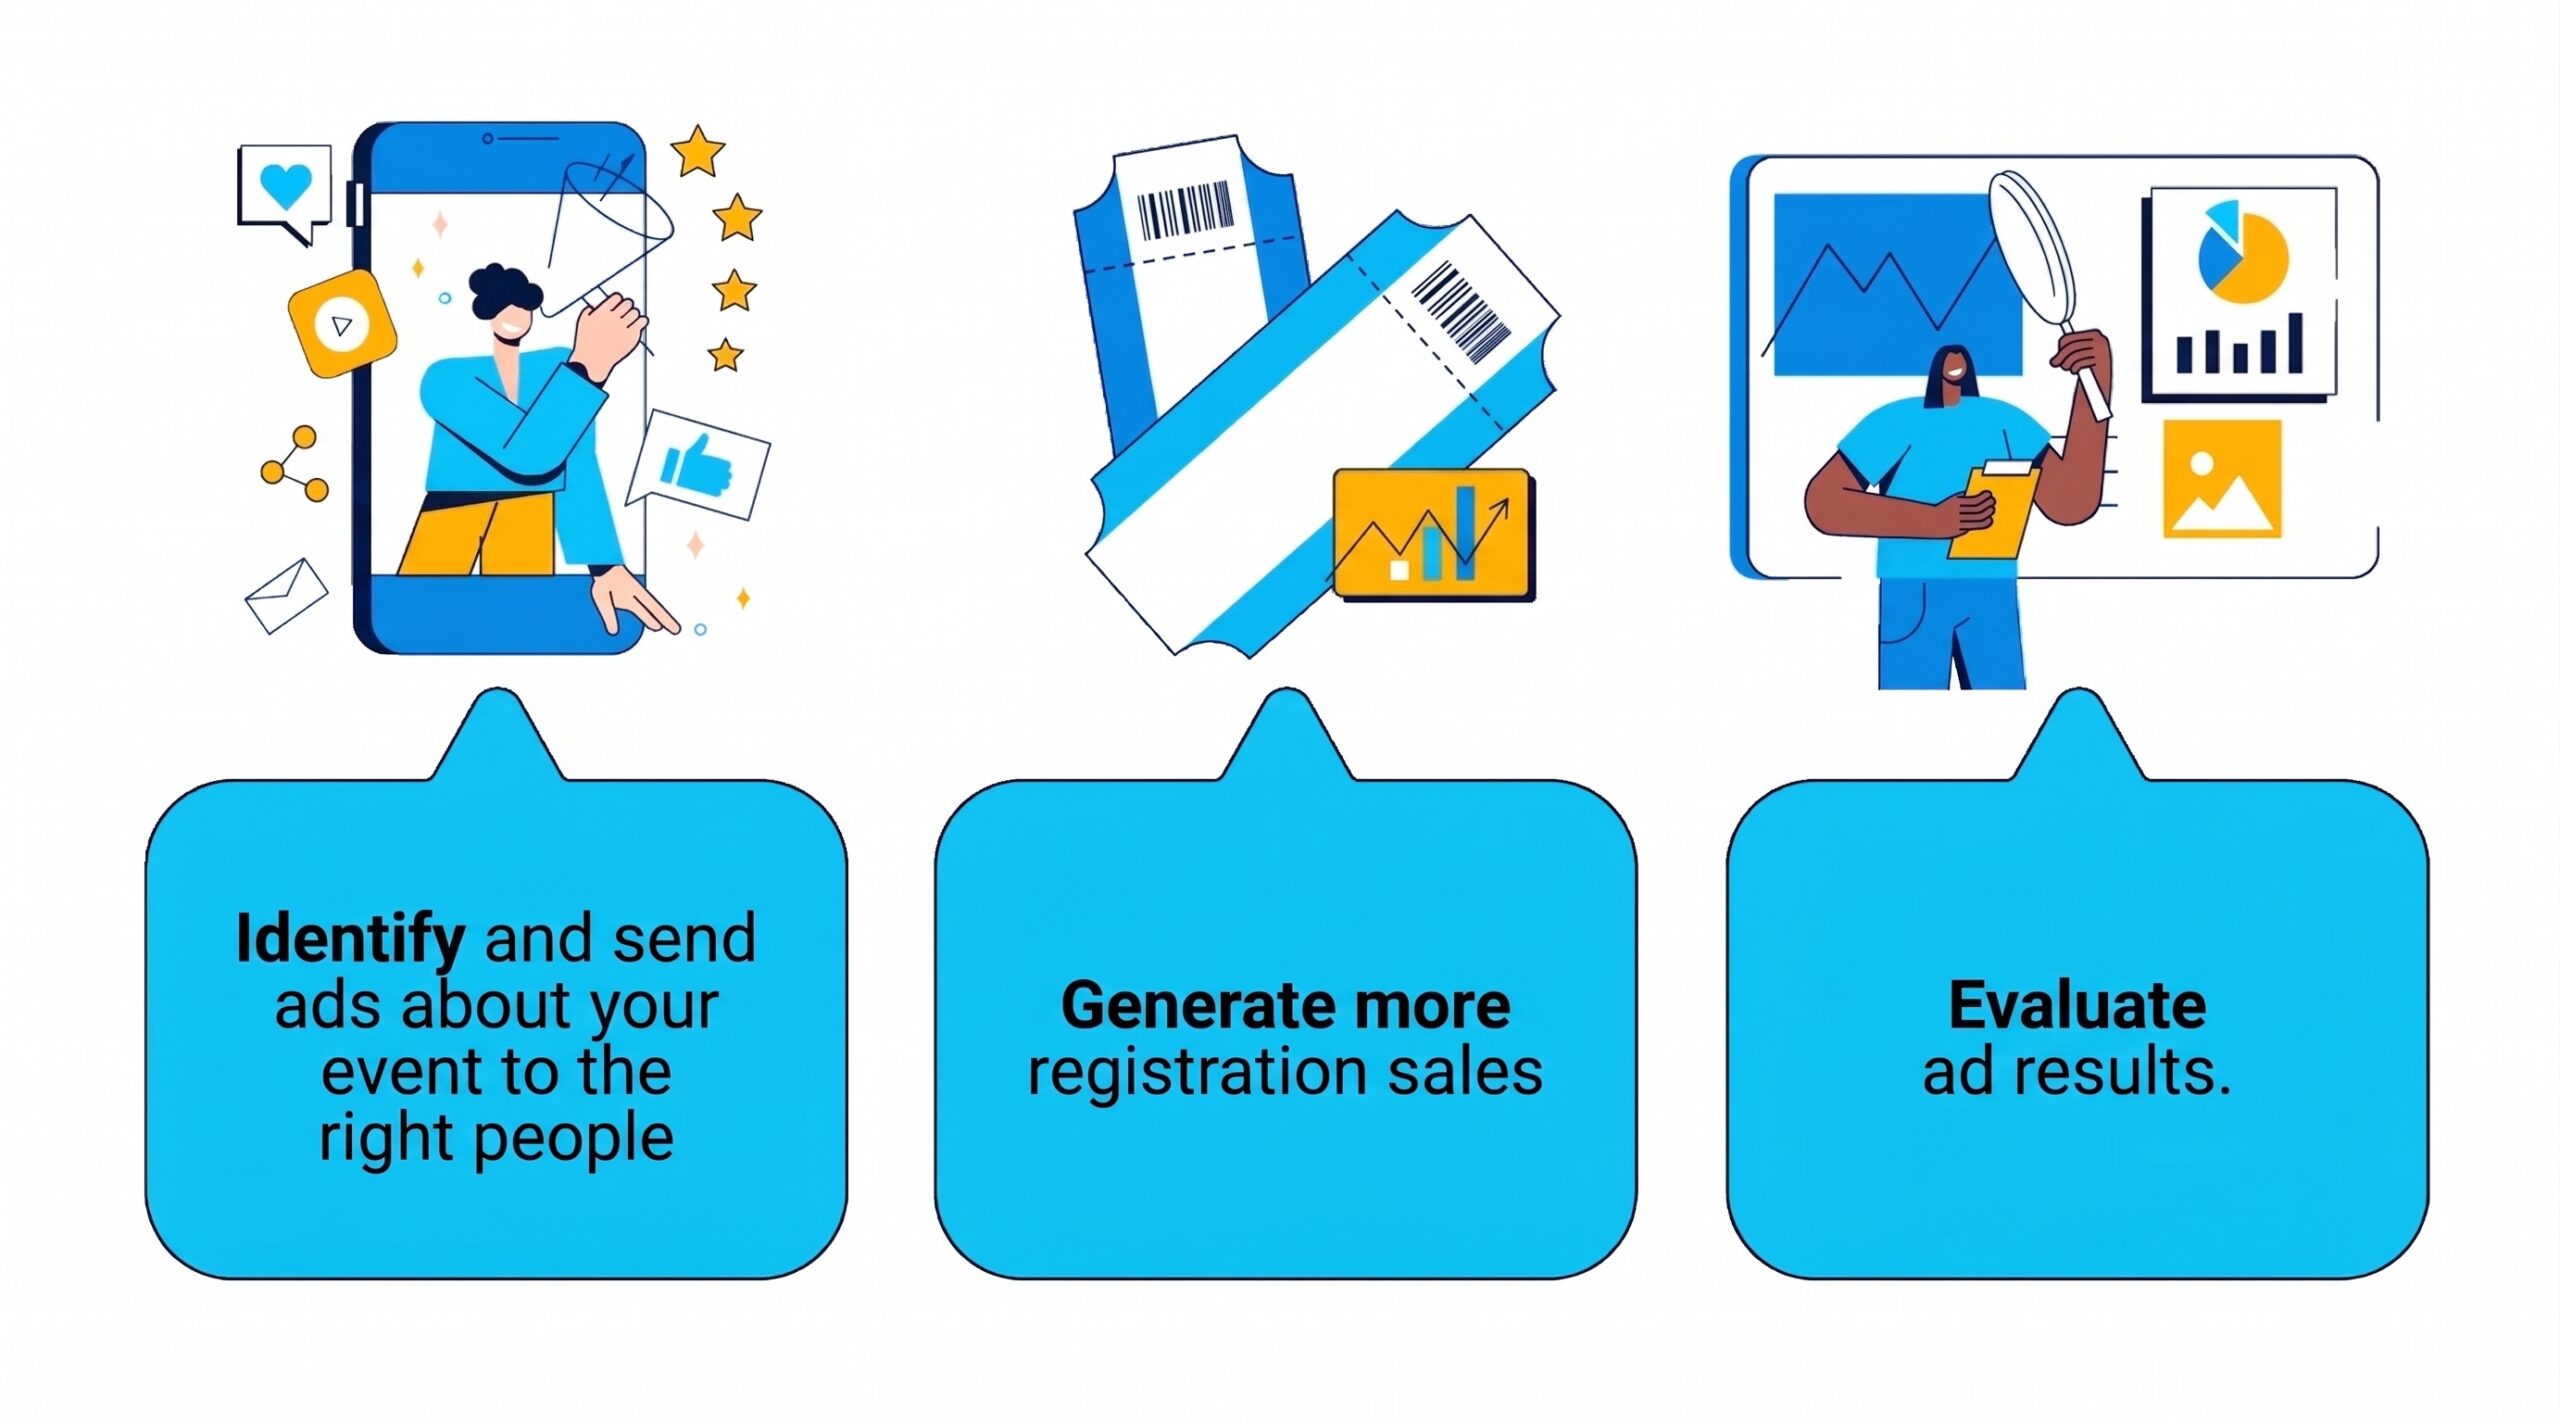
Once you’ve pasted the Pixel code into your event’s site, you’ll be able to:
Actions the Pixel can collect
- Who visited your site;
- What searches were made on the site and by whom;
- What each visitor added to their cart;
- Who has items in their cart but didn’t complete the purchase;
- Who completed a purchase, and more.
Types of audiences you can build for ads
Custom Audience: segment your audience based on the actions they took on your site. For example, create ads targeting people who have visited your event’s site before;
Lookalike Audiences: target new people whose behaviors and interests are similar to the Custom Audience you created.
Facebook Pixel technology will expand your reach and get your event in front of people who don’t know about it yet.
The Pixel’s accuracy and effectiveness improve as you create new ads and they start delivering results.
Ad campaigns you can run
Generate leads
With the Facebook Pixel on your site, you can define what counts as a conversion in your ad campaigns.
Conversions are counted whenever someone interacts with your ad and achieves the intended goal of that ad.
For example, some organizers are interested in reaching people who are interested in the event and communicating with them.
These people are called leads, and they can provide their contact information by filling out forms on your site.
So, if you want to create an ad to generate leads, simply set form submissions as a conversion.
Here’s how it works in practice with Even3:
Events created on the platform can add a free interest form to their site.
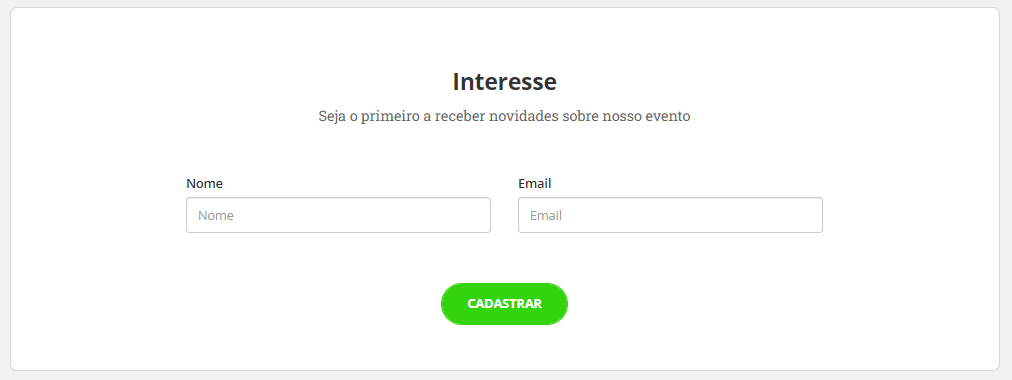
Interest form on Even3
That way, even after your event has ended, you can run an ad campaign to collect data from people interested in the next edition.
When people fill out your form, that will count as a conversion, and you’ll be able to track the campaign’s results.
Boost your sales and measure results
Completing a purchase can also be set up as a conversion.
It happens whenever someone reaches your site through an ad and registers for your event.
So you can use online ads to promote your event and measure whether they’re actually delivering the results you want.
Run remarketing campaigns
Now, have you ever thought about reaching people who visited your event page but didn’t complete their registration? Or even people who added a ticket to their cart but never finished the purchase?
We call this type of action remarketing: sending the right content to people who have already shown intent to register for your event.
Since the Facebook Pixel tracks user behavior on your site, this kind of campaign becomes possible.
That way, this audience is much more likely to finally decide to register for your event if they’re reached with frequent content or special discount coupons.
Optimize your ads
The Pixel also lets you evaluate which campaigns are performing best.
That way, you can run tests by making small changes to your campaigns and comparing the results.
On top of that, the Pixel identifies audience habits and can generate insights for new ad campaigns.
How do you install the Facebook Pixel on your event site?
Everything you need to install the Facebook Pixel is:
✅ An event website;
✅ The ability to add code to the site’s HTML;
✅ The Pixel code in hand.
As mentioned, the Pixel is a snippet of code that you need to paste into your site’s HTML. But don’t worry, it’s not as complicated as it sounds!
In short, HTML is the structure “behind” what you see on the event’s website.
Normally, developers and tech professionals are the ones who make changes to it.
But this has become increasingly accessible to people outside that field.
For example, event platforms like Even3 let you add the Pixel without touching any code at all!
Just paste the Pixel into your event settings, and that’s it. In seconds, it will be installed for free.
If you’re not familiar with HTML, this can be a very practical solution.
Here’s a step-by-step walkthrough of how it works:
1. Create a business portfolio
First, you need a business account on Facebook Business, or a “business portfolio,” as it’s now called.
It’s important that you have full control over the business portfolio.
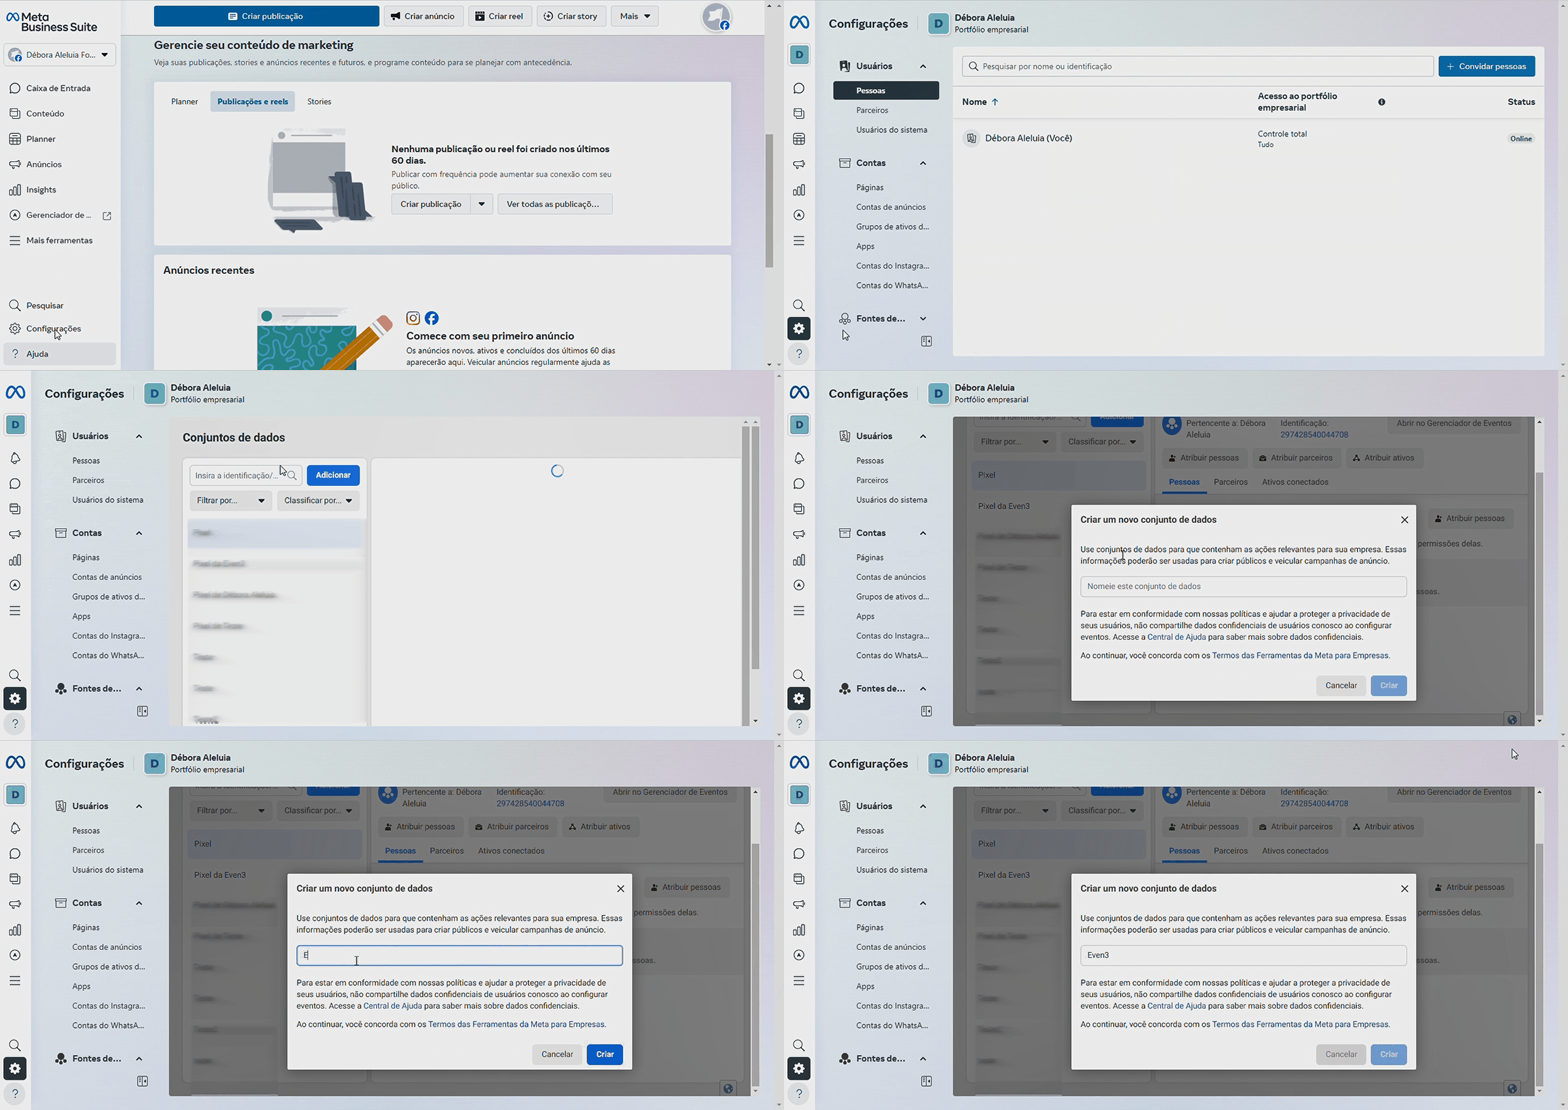
2. How to create a dataset
To get started, the Pixel needs to run within a data source, meaning the place it will pull and save information from.
So before creating a Pixel, you need to tell Facebook which data source will be used.
To do that, go to Facebook Business Settings and follow these steps:
- In the sidebar, under Data Sources, select Datasets;
- Click Add in the search bar at the top of the page;
- Enter a name for your dataset.
3. Set up your Pixel
On Facebook, every conversion resulting from an ad is called an event.
For example, if someone clicked your ad and registered, that’s an “event.”
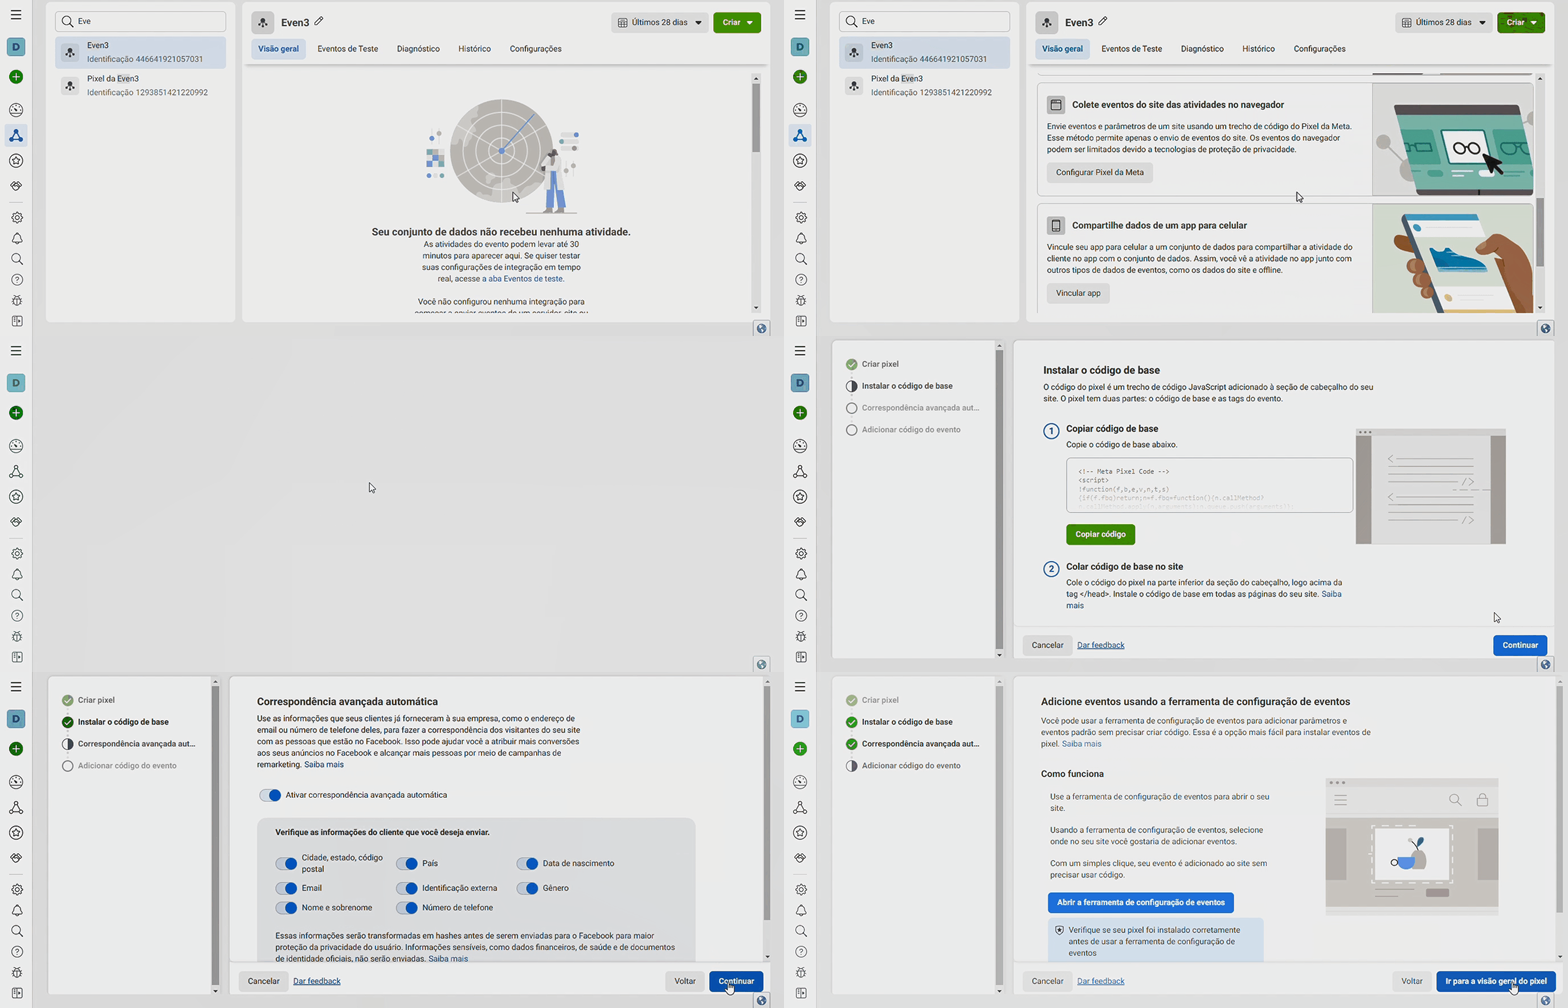
Since the Pixel is the tool that records whether the event happened or not, it needs to be created through Events Manager.
- In Events Manager, click “Data Source” and select the dataset you just created;
- Click Set Up Meta Pixel and choose the manual installation option. Don’t worry though, with the solution described below you won’t need to write any code;
- Follow all the steps until the Pixel installation is complete.
4. Install the code on your event
There are many ways to install a pixel on an event website.
Even though you chose the manual option, you won’t need to write code, have tech experience, or spend a lot of time on the task.
Some event platforms, like Even3, make this easy for organizers.
So here’s all you need to do:
Paste the Pixel code into your event settings
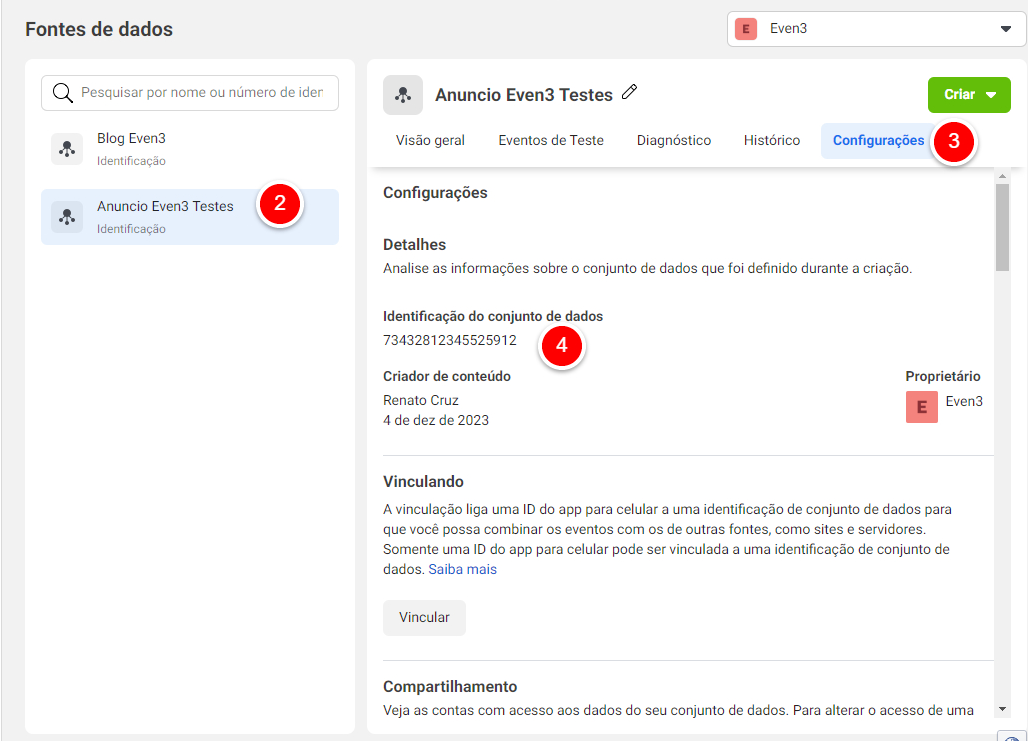
Under data sources, choose the dataset you created;
Click settings and copy the ID number;
Then paste the code into your event settings on Even3.
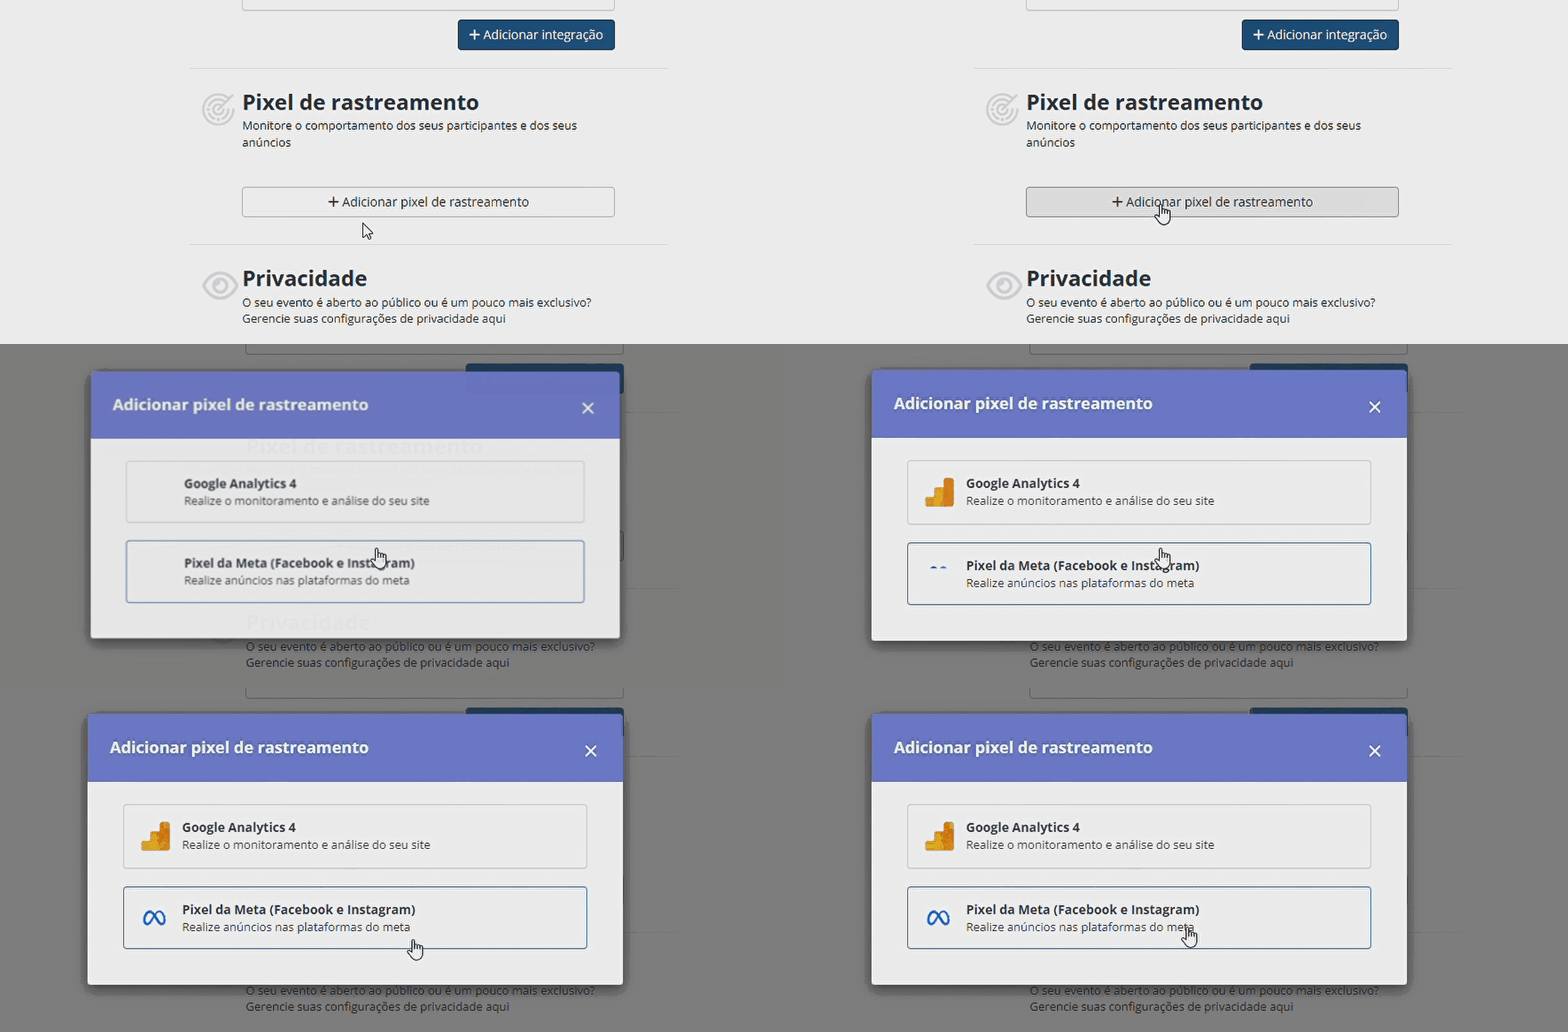
Add your Access Token as well
When you open the Pixel settings in your event, you’ll see a field called Access Token.
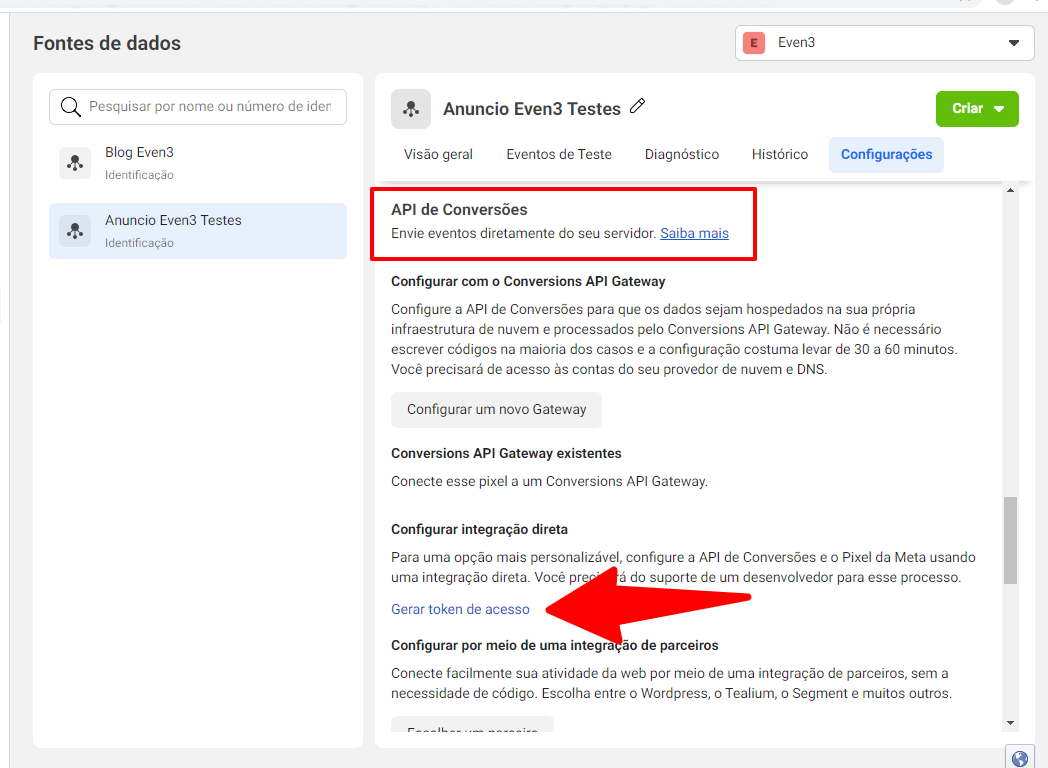
It ensures that the Even3 tool can access your Pixel. So copy the Access Token code and paste it into that field.
To find it, go to the bottom of your data source settings;
In the Conversions API section, click “Generate access token” and paste it into Even3.
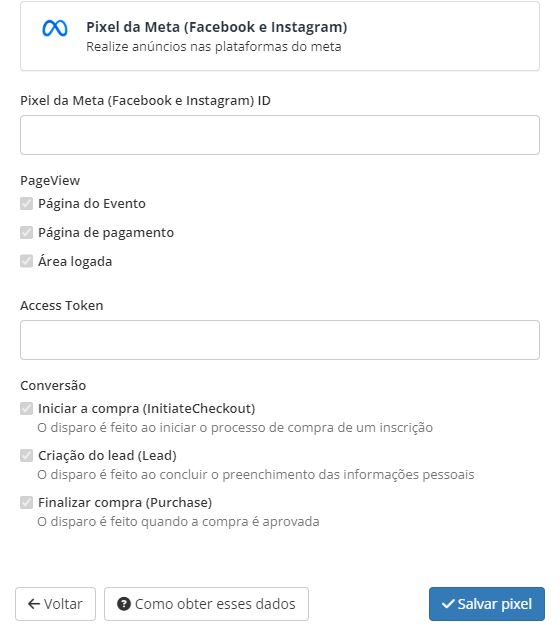
On the Even3 platform, you can select directly which actions you want to measure with your Pixel without worrying about writing any code.
That way, your job gets a lot simpler, and afterward you just check the data inside Facebook itself, use it to optimize your campaigns, and get to know your audience better.
Can you delete a Facebook Pixel?
After going through this whole process, some people wonder if they can delete a Pixel. The answer is no.
But all is not lost! According to Facebook, it’s not possible to delete or transfer a dataset to another Business Manager account.
In that case, it’s best to create a separate Pixel for each event if you’re using different websites. Facebook allows up to 100 pixels per account.
If you end up with too many pixels and want to remove one, the most practical approach is to repurpose an existing Pixel for another project.
However, as you launch new projects, new event sites, and new pixels, it can start to feel overwhelming.
That’s why it’s a good idea to have a development team ready to support your event website.
With Even3, that whole process becomes a lot simpler and faster, thanks to all the support an events platform can offer.
You can also create an attractive event website for free to help boost sales.
Get the full toolkit to customize a site that matches your event’s identity, accept payments securely, handle international registrations, and much more!
Discover what Even3 can do for your next event.